How to Build Your Own Gaming PC from Scratch?
When you're building your own gaming PC, you have control over the parts to fit in it. But your system must match the requirements of the games. Complete the setup so you don't run out of space when playing the game anytime.
Looking for a customized gaming PC? Finding a computer that meets your demands isn't easy. Satisfy your needs by building a killer gaming PC yourself.
When you're building your own gaming PC, you have control over the parts to fit in it. But your system must match the requirements of the games. Complete the setup so you don't run out of space when playing the game anytime.

If you're working inside the chassis to build a PC for the first time, you might think assembling is the only game. But the process isn't easier than you think. So, here's an ultimate guide so you can be one of the veteran builders.
Simple Steps To Build Your Gaming PC
The PC building process involves screwing and cable connecting, so ensure you're doing it right to get a perfect setup.
PC Build Tools
Before you start building a PC, collect the tools you need. You've to prepare your workspace so you can focus on the process.
Workspace
You should have a large workspace or table to build the system smoothly. Also, stand on an uncarpeted surface to avoid an electrostatic discharge that damages the parts.
Screwdrivers
When you're installing the components, you'll need a screwdriver to secure them. Instead of electric screwdrivers, purchase magnetic ones, so screws don't drop inside the case.
Additional Tools
● USB Flash drive
● Movable light source
● Anti-static wrist straps
● Zip ties
● Scissors
Gaming PC Parts
One of the main gaming rigs is the hardware. It accounts for the PC's speed, frame rates, and overall performance. When you've gathered all the tools, it's time to fix the components.
1. Prepare Motherboard
The motherboard is the foundational circuit board connected to everything. CPU and components like hard drives, memory cards, wireless cards, and graphics cards integrate into the motherboard. It's the main part that controls the performance of the PC.
2. Install CPU
When you've set up the motherboard, it's time to install the CPU on it. If you're installing a heatsink, apply the thermal paste and fix it using screws. Heatsinks are necessary so the CPU doesn't reach higher temperatures.
Moreover, the processor's gigahertz matters. Get a higher gigahertz CPU so the processor works faster. Thus speeding up the data transactions.
3. Install RAM
Fix the memory slots on the motherboard. Don't touch the gold pins at the bottom of the CPU; instead, hold memory modules on the side. Align the RAM sticks notches inside the memory slot. Apply gentle pressure to install it.
If the RAM has a greater memory capacity, it'll perform the processing tasks at a faster speed and higher frame rates. Memory is an essential part to amplify the gaming experience.
4. Install the Motherboards Into the Case
Before screwing your motherboard:
● Screw the standoffs in the holes of the case.
● When screwed, insert the motherboard into it. If you don't screw the standoffs first, it's difficult to place your motherboard.
● Leave some space at the case back to adjust the I/O ports.
● Screw everything tightly and move on to the next installation process.
5. Install GPU
GPUs have to be slid into the memory slots and secured with screws. If you're expecting ultra graphics, use RAM with more gigabytes.
So, what you need is a powerful central processing unit, higher GBs of memory, and a high-quality GPU.
6. Install Solid State Drive (SSD)
You've two choices of storage: either a hard disk drive or a solid-state drive (SSD). HDD has more storage capacity, allowing the mechanical system to read and write data.

However, SSD use electrical cells for data transfer. As the NAND flash technology continues to grow, that's why an SSD is preferable in gaming PCs. It's not only energy efficient but also saves file transfer time. So, attach a solid-state drive to the storage interface and secure it in the drive bay.
7. Install Cooling Fans
Cooling fans keep the system at a moderate temperature. Gaming rigs focus on the PC's performance, using high power and creating high temperatures within the system. So, leave airflows to expel hot air from the machine.
You've to install the fans along with its mounted brackets on the motherboard. When plugging CPU fans, apply constant downward pressure to adjust it. There are also two fans: one fan transfers cooling air into the PC, and the second fan expels the warm air out of the system.
That's how you cool the PC and prevent any damage. Adding a CPU fan, a cooling fan, and a cooling kit ensures your system operates well.
8. Install the Power Supply
When it's time to install a power supply, you should know how much energy your rig requires to operate well. Gaming PCs have to be a high-performance workhorse. Thus, you need a robust power supply. Such systems have higher voltages, emitting more heat. So, adjust the cooling fans or internal airflows to avoid heating.
9. Attach Cables & Plug Peripherals
When the systems are almost complete, be sure you've installed the CPU, GPU, heatsink, USB, audio, cooling fan, and power supply according to the instructions.
10. Install the Operating System
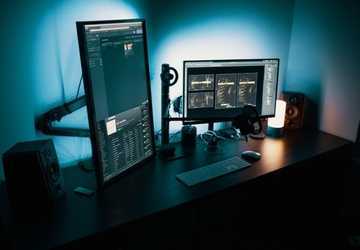
Another step is to see the visuals and operate the system. Most gamers choose PCs to play games because of the peripherals.
So get a monitor plug the mouse, keyboard, and headset to enjoy the gaming. When the screen appears, you've to enter the BIOS. BIOS shows the info about each system installed. Make sure BIOS recognizes everything.
11. Boot Up
When you've assembled the parts and made the entire system, hit the power button. Check if everything's working properly: the computer screen and the flash drives. Once done, boot up and install the OS.
Then restart your PC. It boots from the USB flash drive. When it boots up, you've to install the OS.
Conclusion
Building a PC is a complex process that requires complete knowledge about the system. Understand the mechanics of the PC components you need and how to fix them. If you're new to building the system, follow the above instructions to build your gaming PC.


